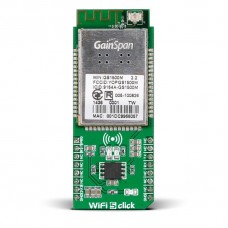
WiFi 5 click
WiFi 5 click features Gainspan’s GS1500M 802.11b/g/n Low Power Wi-Fi module with a PCB trace antenna (external IPX antenna connector also available). The click is designed to run on a 3.3V power supply. WiFi 5 click communicates with the target MCU over a UART interface with additional functionality provided by RST and PROG pins (the latter in place of default mikroBUS™ AN pin).
GS1500M WiFi module
The module supports WiFi PHY rates up to 72.2 Mbps and is fully compliant with 802.11b/g/n and meets worldwide regulatory requirements. GS1500M also provides support for a peer-to-peer networkingcapabilities allowing WiFi devices to connect to one another without an access point, enabling easy transfer of content.
Security features include support for WEP/WPA/WPA2, Adhoc and WPS (Wi-Fi protected setup).
On the hardware side, the GS1500M module comprises two ARM7 44MHz chips (one for the radio, the other for applications), as well as on-chip Flash and SRAM.
Data rates of up to 921.6kbps can be achieved through the UART interface.
Low power consumption
The module can stay in standby mode (7μA) most of the time and only wake up when data transmitting is needed. While in sleep mode it uses only 8mA.
WiFi 5 click is suited for battery powered applications, due to its multiple power modes (stand-by, sleep, deep sleep).
Key features
- GS1500M WiFi module
- Highly integrated 802.11b/g/n Wi-Fi radio
- Supports peer-to-peer networking
- RF Output Power (Typical) 14 dBm (802.11b), 12dBm (802.11n)
- Networking Protocols: UDP, TCP/IP (IPv4), DHCP, ARP, DNS, SSL, HTTP/HTTPS Client and Server
- Interface: UART
- 3.3V power supply
Specification
| Type | Wi-Fi |
| Applications | With its standby, sleep and deep sleep modes, WiFi5 click is particularly suited for battery-powered applications |
| On-board modules | Gainspan’s GS1500M with a PCB trace antenna |
| Key Features | Wi-Fi PHY rates up to 72.2mbps. On-chip 284 KB Flash and 128 KB of RAM |
| Key Benefits | Supports WEP/WPA/WPA2. Compliant with IEEE 802.11b/g/n |
| Interface | GPIO,UART |
| Input Voltage | 3.3V |
| Compatibility | mikroBUS |
| Click board size | L (57.15 x 25.4 mm) |
Pinout diagram
This table shows how the pinout on WiFi 5 click corresponds to the pinout on the mikroBUS™ socket (the latter shown in the two middle columns).
Programming
This snippet demonstrates WiFi5 click connecting to a local network (mikroe public) and fetches weather data from a web site.
 1 void main()
 2 {
 3      // initialize the UART for monitoring the program
 4      UART1_Init_Advanced( 9600,  _UART_8_BIT_DATA,
 5                                   _UART_NOPARITY,
 6                                  _UART_ONE_STOPBIT,
 7                                  &_GPIO_MODULE_USART1_PA9_10 );
 8      Delay_ms(300);
 9      UART1_Write_Text("Uart initializedrn");
10
11      Delay_ms(5000);
12      // initialize the UART for communication between the MCU and the WiFi 5 Click
13      UART3_Init_Advanced( 9600, _UART_8_BIT_DATA,
14                                 _UART_NOPARITY,
15                                 _UART_ONE_STOPBIT,
16                                 &_GPIO_MODULE_USART3_PD89);
17
18      Delay_ms(5000);
19
20
21      UART1_Write_Text("Uarts readyrn");
22
23      Delay_ms(1000);
24
25      // set up the UART interrupt
26      RXNEIE_USART3_CR1_bit = 1;
27      NVIC_IntEnable( IVT_INT_USART3 );
28      EnableInterrupts();
29
30      // clear the buffer and the flags, setting them ready for the program to start
31      clear_serial_buffer();
32      flags_false();
33      UART3_WRITE_TEXT("AT+WPAPSK=MikroE Public,mikroe.guestrn");  // compute the PSK from SSID and PassPhrase
34      while(response_finished == false);                             // wait for the "OK" response
35
36      UART1_WRITE_TEXT(serial_buffer);                               // print out the response
37
38      clear_serial_buffer();                                         // clear the buffer and flags
39      flags_false();
40      Delay_ms(300);
41      UART3_WRITE_TEXT("AT+WA=MikroE Publicrn");                   // try to connect to MikroE Public network
42      while (response_finished == false);                            // wait for the "OK" response
43
44      UART1_WRITE_TEXT(serial_buffer);                               // Print out the response
45
46      clear_serial_buffer();                                         // clear the buffer and flags
47      flags_false();
48      UART3_WRITE_TEXT("at+httpopen=api.openweathermap.orgrn");    // open the api.openweathermap.org web page
49      while (response_finished == false);                            // wait for the "OK" response
50
51      UART1_WRITE_TEXT(serial_buffer);                               // print out the buffer
52
53      clear_serial_buffer();                                         // clear the buffer and the flags
54      flags_false();
Code examples that demonstrate the usage of WiFi 5 click with MikroElektronika hardware, written for mikroC for FT90x and ARM are available on Libstock.
Downloads
Enter the code in the box below:


