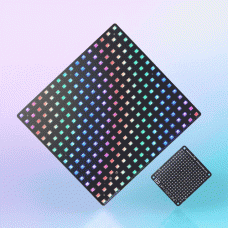
Features
- 256 RGB LEDs in a 16x16 matrix
- Pixels driven by ARM STM32F and three STP16CPC26 LED drivers
- 2x20 pin female header for Raspberry Pi
- Data in and out headers (for chaining Ubercorns)
- Address select DIP switch (addresses 0 to 7)
- Screw posts for external power (5V)
- Mounting holes
- Compatible with Raspberry Pi 3B+, 3, 2, B+, A+, Zero, and Zero W
- Python library
- Comes fully assembled
Dimensions: 192x192x12.75mm
Kit includes
- Full-assembled Ubercorn PCB
- 2x20 pin female header to boost height for Pi B+, 2, 3, 3B+
- 4x M2.5 16mm metal standoffs, 8x M2.5 6mm screws
We've designed Ubercorn with a 2x20 pin female header, just like a regular HAT, so that you can pop a Raspberry Pi right onto the back. You can use the included screws and standoffs to hold your Pi securely to the back of Ubercorn.
If you connect a power supply to the two screw terminals, then it'll back-power your Pi too. With a single Ubercorn and good-quality 2.5A power supply, you can connect the power supply to your Pi and it'll provide sufficient power for Ubercorn also.
Software
Ubercorn can be driven with the Unicorn HAT HD Python library. We've updated the library to accommodate larger-sized matrices, so all you need to do is specify the total width and height of your matrices, the top left pixel coordinates for each matrix, and their rotation. If you're just using a single matrix, you don't need to worry about this, and you can just use the software in exactly the same way as Unicorn HAT HD.
Software does not support Raspbian Wheezy.
Notes
- If using the screw terminals on the back of Ubercorn for power, do not use power supplies that supply any more than 5V or you'll risk damaging both your Ubercorn and your Raspberry Pi
- Power requirements: each Ubercorn panel will draw about 1A at 5V, meaning that a single Ubercorn should run fine from a standard 5V/2.5A Raspberry Pi power supply. You might just get away with running two from a single power supply. Larger setups will require additional power, supplied through the screw terminals on the rear of Ubercorn. Power can be daisy-chained from panel to panel (via the screw terminals), provided you have sufficient current to drive all of the panels.
- Be very careful to connect your Pi properly to the header, ensuring that it's i) the correct way round (the outline of the Pi Zero on Ubercorn and the four mounting holes for a larger Pi should show you the correct way), and ii) that the pins are all correctly lined up, i.e. not offset. Again, connecting it incorrectly will cause damage to both Ubercorn and your Raspberry Pi.
- The pinout of the data in and out headers is (from top left, and from left to right) GND, GND, CS, SCLK, MOSI, NC (not connected), GND, GND.
- Unicorn HAT HD pictured for scale, not included


