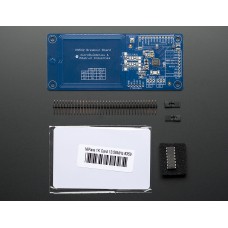
PN532 NFC/RFID Controller Breakout Board - v1.3
The PN532 is the most popular NFC chip, and is what is embedded in pretty much every phone or device that does NFC. It can pretty much do it all, such as read and write to tags and cards, communicate with phones (say for payment processing), and 'act' like a NFC tag. If you want to do any sort of embedded NFC work, this is the chip you'll want to use!
NFC (Near Field Communications) is a way for two devices very close to each other to communicate. Sort of like a very short range bluetooth that doesn't require authentication. It is an extension of RFID, so anything you can do with RFID you can do with NFC. You can do more stuff with NFC as well, such as communicate bi-directionally with cell phones
Because it can read and write tags, you can always just use this for RFID-tag projects. We carry a few different tags that work great with this chip. It can also work with any other NFC/RFID Type 1 thru 4 tag (and of course all the other NXP MiFare type tags)
The PN532 is also very flexible, you can use 3.3V TTL UART at any baud rate, I2C or SPI to communicate with it. This chip is also strongly supported by libnfc, simply plug in an FTDI cable and use the FTDI serial port device to communicate - this lets you do NFC dev using any Linux/Mac/Windows computer!
Comes with: the PN532 breakout board including a tuned 13.56MHz stripline antenna, 0.1" header, 2 jumpers/shunts and a 4050 level shifter chip. We also toss in a Mifare Classic 1K card! (You can get more tags from us here) New in version 1.3:onboard power LED, 3.3V regulator and an FTDI header so you can plug in an FTDI friend or FTDI cable and use with libnfc.
Enter the code in the box below:


